Product Information
FOR THE APPLICATION OF THE CLAYWORKS BASE COAT, PLAIN COAT, SMOOTH PIGMENTED COAT(MICA and non-MICA) and RUSTIC TOP COAT CLAY PLASTERS
Clayworks strongly recommends using Clayworks approved applicators for all of our finishes: please contact us.
Clayworks Clay Plasters do not suit exteriors or areas that are wet or extremely damp.
1. RANGE OF FINISHES
Smooth and Tonal Finishes
These are our smoothest finishes, created with the finest raw materials.
Demi Rustic Finishes
A clay plaster with slightly larger aggregate grain sizes, thus providing a subtly coarser finish and a slightly thicker application in one coat. The health and performance benefits are enhanced due to the additional material in use.
Rustic Finishes
A single coat, robust and coarser finish ideally suited for artisanal finishes such as two-tone carving and relief work.
Custom Finishes
For the full range of our custom finishes click here.
Standard shipment quantity: 25 kg bags.
Coverage: (per 25 kg bag)
Smooth Finish: 7-8 m² @ 2 mm thickness.
Demi-Rustic Finish: 2.6 m² @ 4-5 mm thickness.
Rustic: 1.5 m² @ 6-7 mm thickness.
Coarse Rustic: 1 m² @ 8-12 mm thickness.
Base Coat: 1.25 m² @ 10mm thickness.
Loose weight: 25 kg dry powder in brown paper bags.
Amount of Water: (per 25 kg bag)
Smooth Finish: Approximately 10 litres
Demi Rustic Finish: Approximately 6.5 litres
Rustic Finish: 6.5 litres
Walling surfaces
Suitable for use on most stable internal surfaces when properly prepared with Clayworks Primer. Such surfaces include plasterboard or gypsum plaster surfaces. Rough surfaces require a straightening coat of lime or clay. Not to be used in areas in direct contact with liquid moisture, excessively damp areas or the elements, although can be used in areas of high humidity, such as bathrooms and kitchens.
Not suitable for floors or stair treads.
Clayworks Clay Plasters are suited to historic and eco-walling substrates such as cob, lime, hemp and straw bale due to their breathability and elasticity.
Fire resistance:
Class 1. (BRE Tested)
Moisture absorption value:
1.28 for Smooth and 1.4 for Rustic [calculated by moisture change (g/m²) divided by relative humidity] where buffering was tested to be 9x that of painted plasterboard. (University of Bath figures).
Health & Safety
Non caustic: can be handled without gloves. Wear a dust mask when mixing dry powder.
Application
Applied in the conventional manner with a hawk and laying on trowel. Can also be applied with a spray machine. Application is similar to gypsum with the exception of the finishing process. A smooth finish is preferred for durability and cleaning. This is achieved by hard polishing with a plastic trowel or a Japanese Trowel. However, an open grained, more textured finish can be achieved using a damp sponge to loose trowel marks. This is often a more suitable finishing approach for undulating surfaces. Please see our guidance notes for detailed application guidelines, downloadable from our website www.clay-works.com
Finishing
Best finished with Clayworks protective glaze for maximum damage resistance. Can be painted with micro-porous paint.
Drying Times
Dependent on ambient conditions in the room and rates of absorption from the background material. In ideal conditions, the plaster should be fully dry within 24 hours. Good air circulation is encouraged during and after application.
Low, even heat can be used in cold conditions, but must be used with caution as it can cause hairline cracks in the plaster if it dries too quickly.
Working Conditions
Application should not proceed when temperatures fall below 5 degrees centigrade or rise above 30 degrees centigrade.
Cleaning
Wipe gently with a soft, damp sponge, if it has been finished previously with Clayworks protective glaze. On textured surfaces, such as the Arakabe or Sculpted, cleaning should be carried out with due care and attention avoiding rough treatment of the surface.
Hanging pictures
Observe the same protocol as for conventional plaster using picture hooks or screws.
2. PHYSICAL PROPERTIES AND COVERAGE
Density
Smooth and Tonal Finish: 1600 kg /m3
Demi-Rustic Finishes: 1722 kg / m3
Rustic Finishes: 1722 kg / m3
Impact
Smooth and Tonal Finish:BS EN 520 – Impact Diameter < 15mm
Demi-Rustic Finishes:BS EN 520 – Impact Diameter < 15mm
Rustic Finishes: BS EN 520 – Impact Diameter < 15mm
Thermal Conductivity
Smooth and Tonal Finish: 0.84 w/mK
Demi-Rustic Finishes: 0.97 W/mK
Rustic Finishes: 0.97 W/mK
Moisture Buffer Value
Smooth and Tonal Finish: 1.28
Demi-Rustic Finishes: 1.4
Rustic Finishes: 1.4
Thickness when applied
Smooth and Tonal Finish: 2 mm
Demi-Rustic Finishes: 4-5 mm
Rustic Finishes: 6-7 mm
Coverage per 25 KG Bag
Smooth and Tonal Finish: 7-8 m² (at 2 mm thick)
Demi-Rustic Finishes: 2.6 m² (at 4-5 mm thick)
Rustic Finishes: 1.5 m² (at 6-7 mm thick)
Coarse Rustic Finishes: 1 m² (at 8-12 mm thick)
VOCs
Smooth and Tonal Finish: Zero
Demi-Rustic Finishes: Zero
Rustic Finishes: Zero
Embodied Carbon
Smooth and Tonal Finish: 0.1162 Kg CO2 eq/Kg
Acoustic Absorption Properties
Smooth and Tonal Finish: Noise Reduction Coefficient (NRC): 0.10 NRC: Sound Absorption Coefficient: 0.090N
Demi-Rustic Finishes: Noise Reduction Coefficient (NRC): 0.10 NRC: Sound Absorption Coefficient: 0.090N
Rustic Finishes: Noise Reduction Coefficient (NRC): 0.10 NRC: Sound Absorption Coefficient: 0.090N
Origin: All Finishes: Cornwall, UK
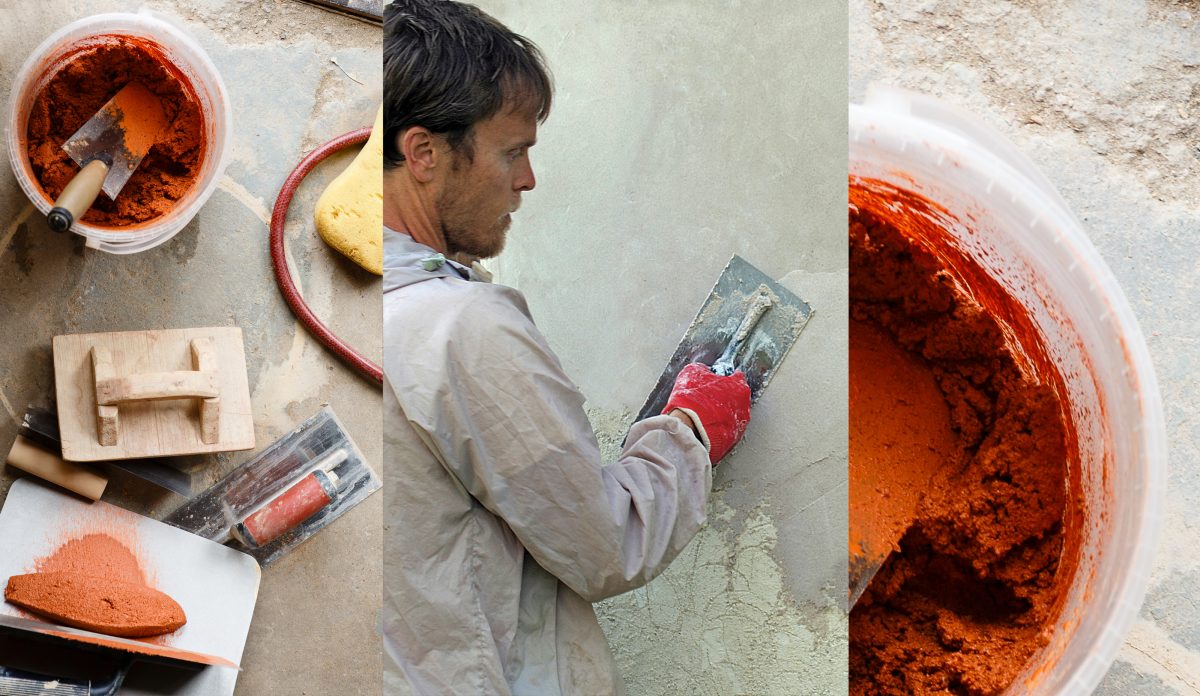
3. TOOLS FOR THE JOB
The tools needed to apply all Clayworks clay plasters are essentially the same as for any other plastering job:
• Hawk
• Laying on trowel
• Detail trowels
• Plastic polishing trowel
• Fine mist sprayer
• Clean buckets for mixing
• Clean water
• Hand held plasterer’s whisk
• Sponges
• Masking tape
• Protective sheeting
• Appropriate respiratory protection.
• Specialist Japanese Rectangular trowels (essential for polishing/finishing)
• Plastic trowels (for polishing/application of glaze).
For large projects, spray application is also possible.
4. THE FINISHES
Clayworks Smooth Finish
With a soft texture, this fine finish produces beautifully smooth textured walls and is usually the preferred choice for private homes. Subtle tonal and textural variations take the fear out of minimalism or large empty walls.
Available in all of our colours, this finish is 2 mm thick.
Clayworks Tonal Finish
Delicate, nuanced and tactile with a silky smooth polished finish and rich tonal variation.
The raw yet highly refined and luxurious Tonal Finish is imbued with warmth, elegance and sensuality, instilling a sense of emotion and motion into a space.
Available in all of our colours, this finish is 2 mm thick.
Often specified for a polished cement aesthetic, it is a non toxic, healthy and sustainable alternative.
Clayworks Demi Rustic Finish
Introducing a little more texture, our Demi Rustic is our easiest plaster to apply. It can be finished with different trowels and plastering techniques to achieve different aesthetics from relatively smooth, to more textured. Our easiest plaster to apply.
Available in all of our colours, this finish is normally 4-5 mm thick.
Natural materials such as straw and minerals that resemble gold fleck can be added for endless variations and interest.
Clayworks Rustic Finish
Rich in character, with varying degrees of coarseness, the Rustic Finish can be applied to create a rustic yet modern space and offer the opportunity for unique customisations of spaces.
Available in all of our colours, this finish is normally 6-7 mm thick.
Natural materials such as straw, heavier aggregates and minerals that resemble gold fleck may be added. Heavier Textured, coarser Rustics are available for a more earthy, monolithic feel to a space.
5. WHERE TO USE CLAY PLASTER
Clayworks Clay Plasters are for internal spaces. Clayworks clay plasters do not chemically set and will therefore not withstand exposure to large amounts of liquid moisture (i.e. rain or showers). We do not recommend application as an external wall finish. One exception is where an external wall is protected by a porch or veranda roof. We also do not advise that they be used in internal areas that are subject to ongoing extreme damp. Clayworks clay plasters are beneficial in areas of high moisture vapour, such as kitchens, bathrooms and laundry rooms. They help regulate excess moisture vapour generated by showers, baths, cooking, washing etc. However, we advise to keep the plaster out of contact with water splash-back zones, such as behind sinks and baths. Tiles are better suited to these areas.
The key to producing a good finish? It’s about achieving:
1) The correct suction balance and…
2) Strong mechanical adhesion. Substrates that have little or too much suction, and no mechanical key must first be primed. Please talk to us if you are not sure.
6. WALL PREPARATION FOR RANGE OF COMMON SUBSTRATES

Plasterboard or existing gypsum finished surfaces
Prime with Clayworks Primer to provide the necessary mechanical key and balanced suction. No additional base coat is needed, however, a clay base coat mix will build thickness and mass into the wall and maximise the health and performance benefits of the plaster.
Prepare plasterboard joints with scrim tape, as per normal protocol using a standard joint compound.
If applying Clayworks directly onto the primed plasterboard surface, it is advisable to use an extra fine fibreglass mesh (at 100 mm wide joints) to scrim the joints to avoid them from ‘grinning’ through.
Friable surfaces
Scrape back all loose material, and apply a coat of Primer to consolidate the surface.
Cement block, fired clay brick, smooth clay block, non- porous stone and similar substrates:
Please see Design Detail DD03.
Render carrying boards, such as Diffutherm, Heraklith, Pavatherm, Pavadentro
Please contact us to discuss.
7. MIXING CLAY PLASTERS
• Health & Safety
• Mixing Protocol
• Storage
• Leftovers & Disposal
• Tool Cleaning
The plaster is safe to handle without gloves. But please ensure adequate respiratory protection – avoid inhalation of fine dust particles.
Clayworks dry powder clay plaster should be mixed in a bucket with a plasterer’s whisk.
1. Pour the dry powder contents into a bucket.
2. Blend the dry powder with a plasterer’s whisk for a few minutes to ensure even distribution of pigment and other ingredients, which may settle during transit.
3. Add half the amount of the required clean water (out of the total amount required) to a separate clean bucket.
4. Add the dry powder to the water in small increments, mixing with a plasterer’s whisk as you add it.
5. Add most of the remaining water, one litre at a time, as you add the dry powder, until the desired laying on consistency is achieved: The plaster should resemble a mousse-like consistency – wet enough to flow smoothly off the trowel and onto the wall, but firm enough to hold it’s form on the hawk.
6. After initial mixing, let the mix sit for ten minutes to half an hour to ‘tighten up’.
7. Finally, add the remaining water, to bring it back to the original consistency.
Notes & Tips
Please note: The mix will ‘tighten up’ in the bucket over time. It may need more water to maintain its consistency. Throughout the plastering session, monitor and add water according to personal preference.
There are natural additives present in the Clay Plasters. These have a shelf life of 1-2 days once mixed with water. We advise you to only mix what you will plaster that day. All other Clayworks Clay Plaster mixes (with the exception of when straw is added, which will decompose over time in the bucket once mixed with water) will remain useable indefinitely once water has been added – just add more water and blend for use.
Retain surplus dry powder for repairs. Store it in a sealed container, somewhere cool and dry.
Tools should be cleaned thoroughly with water after use.
8. USING CLAYWORKS PRIMER
Before using, thoroughly mix the contents of the bucket to evenly distribute the grit settled at the bottom. You may also have to keep mixing as you apply to prevent settling and ensure maximum grit in each stroke.
Apply with a standard paintbrush, maintaining a wet edge at all times.
Apply as thickly as possible, ensuring all areas receive a full coating of grit. Once applied, assess if there are any bald spots, and re-apply onto these areas if necessary. An even, thick covering of grit is ESSENTIAL for successful clay plaster performance.
Ensure primer is fully dry before applying clay plaster.
9. USING CLAYWORKS BACKING COATS
Guidelines for preparing a clay backing coat (optional) before applying Clayworks Smooth & Tonal Finishes:
A clay backing coat might be used where a surface is uneven such as straw, or for where greater performance benefits associated with using clay are required.
Score the backing coat evenly and shallowly to provide mechanical key. Deep scoring and inconsistencies in the base coat will show through the Smooth and Tonal finish.
• A devil float is a great tool for this job.
• Make the base as smooth and flat as possible, unless an undulating finish is desired.
Ensure primer is fully dry before applying clay plaster.
10. MOISTENING THE WALL SURFACE BEFORE PLASTERING
• Moisten backing coats with clean water before plastering, according to the type of wall substrate, as well as the temperature and humidity in the room.
• Backing coats with a lot of suction (such as clay or lime) require thorough moistening before application as well as during the plastering process.
• Primed plasterboard surfaces do not require moistening.
• Warm days require more generous moistening of the walls, whereas cold, damp days require less.
• Use a fine mist sprayer.
• For very thirsty backgrounds, or for the inexperienced plasterer, primer can be painted onto the base coat. This will slow the rate of suction from the background, allowing for a longer working time.
11. GUIDELINES FOR SPECIFIC CLAY PLASTER FINISHES
All Clayworks clay plasters are best applied using a hawk and steel ‘laying on’ trowel.
Clayworks Smooth and Tonal Finishes
Ideally applied in two passes to a final thickness of 2 mm. It is essential that it does not exceed 2 mm. (These finishes can tolerate a maximum thickness of 2mm). The first pass is applied at an average thickness of 1mm to provide an even coverage across the full surface. Use broad, vertical strokes. Do not overwork the plaster at the initial stage. Once the section being worked on has firmed up slightly (approximately 2-3 hours depending on localised conditions), apply a second, thin skim coat using a slightly wetter mix, to remove any imperfections in the original plaster coat. Once the second pass has been applied, the plaster should be left to set for approximately 30 minutes to 2 hours (+/- will depend on room temperature/humidity and absorption rate of substrate). When to continue? A good indication is when the plaster stops moving under the trowel and the moisture shine on the surface of the plaster has begun to dull.
You can then smooth away the trowel marks. The best tool for this job is a rectangular Japanese trowel with a thin, slightly flexible blade. Apply light strokes with the trowel, moving in all directions. If the plaster is moving around under the trowel, and/or clay residue is left on the surface of the blade, it is too early. Stop, and wait until the plaster is dry enough to glide over the surface smoothly and cleanly. If the plaster feels too dry/hard under the trowel, gently mist the wall with a fine mist sprayer before troweling. Alternatively, the trowel surface can be moistened. A plastic polishing trowel can also be used to good effect. Clayworks Clay Plaster likes to dry naturally. Gentle air circulation is best. Keep external heat sources/strong draughts to a minimum. An electric fan may be used to enhance air circulation.
Clayworks Demi Rustic and Rustic Finishes, and Base Coat
Clayworks Base Coat is applied at 8-10 mm thick. Rustic is applied at 6-7 mm thick. Demi Rustic Finishes are applied at roughly 4-5 mm. Apply using broad strokes with the trowel taking care not to overwork the plaster at this stage. Use the trowel to work out any of the main imperfections in the plaster and remove any excess material from the wall to achieve an even spread across the surface.
12. FINISHING EFFECTS
• Hard troweled for a closed grain polished effect (more durable).
• Sponge finish for an open grained, softer finish (easier on undulating walls).
There are slight variations in the way each Clayworks plaster coat is finished. In general, the two principles are as follows: (for specific finishing guidelines for each coat see below).
Hard Trowelled
A great finish can be achieved with a stainless steel Japanese trowel with a flexible blade or a plastic trowel. Polishing with either of these trowels is an essential step to achieving a smooth, durable finish. We do not recommend using a steel laying on trowel for polishing, as the blade is not flexible enough, and this type of steel will oxidize on the plaster surface leaving black marks.
Sponge finish
As an alternative to hard polishing, the plaster can be finished with a sponge or sponge float. When the plaster has hardened sufficiently, work the plaster with a damp sponge. Use a circular motion. This will give a softer, grainy effect, as the sand particles are brought to the surface. Any remaining sandy residue can be brushed off the surface of the wall with a soft brush when it is fully dry.
Our preferred finish for Clayworks Smooth Finish is a troweled polish. This is because the closed grain produces a harder, more durable finish. However, undulating walls such as old cob walls can be difficult to hard trowel. A Tadelakt polishing stone can be used to navigate the undulations. A sponge finish can be used on straight walls, if this finish is preferred for aesthetic reasons.
13. FINISHING EFFECTS: SMOOTH AND TONAL FINISHES
The plaster is ready for polishing when it has hardened sufficiently so that it does not leave any residue on the trowel and does not move around under the trowel. If the plaster is too dry, the wall can be finely misted with water to moisten it. Alternatively the trowel can be moistened before polishing. The ideal time is when the trowel makes a distinct high-pitched ringing sound as it glides across the wall and leaves a polished sheen.
14. FINISHING EFFECTS: DEMI RUSTIC
Hard Trowelled
Wait until the plaster has relinquished most of it’s moisture, but is still workable. Using a wooden or polyurethane float, scour the material back to eliminate high spots and fill in low spots, until a flat, smooth surface has been achieved (unless executing a highly textured, artisanal finish).
Use a stainless steel Japanese trowel to polish the plaster, making it smooth and closed.
Scoured
Wait until the plaster has relinquished most of it’s moisture, but is still workable. Using a wooden or polyurethane float, scour the material back to eliminate high spots and fill in low spots, until a flat, smooth surface has been achieved (unless executing a highly textured, artisanal finish).
Sponged
Wait until the plaster has relinquished most of it’s moisture, but is still workable. Using a wooden or polyurethane float, scour the material back to eliminate high spots and fill in low spots, until a flat, smooth surface has been achieved (unless executing a highly textured, artesanal finish). Use a large, damp builders sponge to work the plaster in a circular motion, bringing the sand particles to the surface. Any remaining sandy residue can be brushed off the surface of the wall with a soft brush when it is dry.
15. FINISHING EFFECTS: RUSTIC
Scoured
Wait until the plaster has relinquished most of it’s moisture, but is still workable. Using a wooden or polyurethane float, scour the material back to eliminate high spots and fill in low spots, until a flat, smooth surface has been achieved (unless executing a highly textured, artisanal finish).
Sponged
Wait until the plaster has relinquished most of it’s moisture, but is still workable. Using a wooden or polyurethane float, scour the material back to eliminate high spots and fill in low spots, until a flat, smooth surface has been achieved (unless executing a highly textured, artisanal finish). Use a large, damp builders sponge to work the plaster in a circular motion, bringing the sand particles to the surface. Any remaining sandy residue can be brushed off the surface of the wall with a soft brush when it is dry.
16. PROTECTIVE TRANSLUCENT WALL GLAZE
Clayworks translucent wall glaze offers a protective, non-toxic, breathable finish. It makes the plaster more durable to knocks and bumps, as well as allowing it to be wiped gently with a damp sponge. The glaze provides a deep, lustrous sheen, bringing out the rich nature of the plaster.
Apply a minimum of two coats and up to four for areas of high traffic.
To apply the glaze, wait until the plaster is fully dry. Allow several days, depending on prevailing temperature/humidity and rate of wall suction. Mix the glaze with clean water in a ratio of 2 parts clean water to 1 part glaze (2:1).
It is preferable to spray the glaze onto the wall using a fine mist sprayer. It should be sprayed on evenly and systematically, using a plastic trowel to catch and re-distribute any drips, working it into the wall to achieve a high sheen (note: it is not possible to achieve this sheen with the Rustic Finishes).
An alternative method is to apply the plaster using a clean, soft paintbrush, taking care not to saturate the wall. Cover roughly 0.5 square metres at a time. Work the glaze into the plaster with a plastic trowel using forceful strokes in all directions, until all traces of white glaze have been distributed over the wall surface. Move excess glaze onto a dry section of wall using a brush or plastic trowel. Continue this process until the wall has been covered.
Wait 12 hours before applying a second coat.
The second coat, as well as all subsequent coats, should be applied in a ratio of 1 part clean water to 1 part glaze (1:1). Glazes can be reapplied whenever the wall needs freshening (1:1 ratio).
Clayworks Clay Plasters can be finished without applying the protective glaze. This will produce a lighter, matte finish.
It is essential to wear a protective face mask when spraying the glaze onto the wall.
Please note: When applying protective wall glaze over large areas of walling, it may produce some slight colour variation in the plaster, as it highlights the subtle nuances. Our natural clay plaster will not produce a uniform ‘Dulux’ finish and should not be used if this is what you are looking for! The overall effect is one of depth and movement as it dialogues.
17. CORNER REINFORCEMENT
For primed plasterboard and other render carrying boards use either stainless steel, aluminium, plastic beads or glass fibre corner reinforcement mesh systems. If using glass fibre reinforcement corner mesh, corners can be rounded using limewall finish or a gypsum based backing coat.
All corner reinforcement materials MUST be primed on all areas with Clayworks Primer before Clayworks Clay Plaster is applied – paint onto the exposed areas of beading.
Plastic corner beading can be colour-matched through specialist suppliers (SAS Direct and LocusRite) to produce a seamless, durable corner.
A note on corners: rounding them off makes them stronger and decreases the risk of damage.
For further information on design detailing click here.